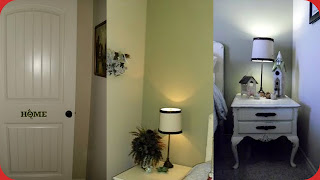
Here it is before I got started. As you can see it really needed some help. First I de-cluttered and hauled some stuff to the garage. Mom's main goal was to reuse what she already had and try not to spend much on new things to clutter up the room. I decided that I would tackle the dark furniture and paint it so that it looked more like a set. I have been a fan of Perfectly Imperfect Blog for a while now and she just raves about Annie Sloan Chalk Paint. Her furniture redo's are beautiful and her tutorials and videos are extremely helpful. I found a local supplier, Wonder Faux Studio, if you are in the Houston area, they were really great! The staff was so helpful and they have many pieces to show you using the different colors and waxes, it was a big help as I decided what direction I wanted to go with this project. They offer classes and workshops that teach techniques using the chalk paint and other popular faux products.
The thing about chalk paint that drew my attention was that you don't have to prep your surface before you paint it. I don't necessarily have the patience to sand, strip, or prime any furniture. That being said, these tables were rough! Mom has had them for years and they have nicks and scrapes and water stains. The chalk paint covered those blemishes right up!
The headboard had seen better days as well. It is actually something that Mom found almost 20 years ago while "junking" in Germany. It was dark as well and had a few rough patches, and was an oak veneer so I didn't feel guilty painting it. It was actually a king size headboard made out of two pieces that joined in the middle, we were able to trim it down on the outside edges to properly fit the queen size bed. I can't believe I forgot to take a before picture of the headboard, but you can see the back side of it in the photo and it was just your typical boring oak but it did have a pretty beveled edge with a small scroll design along the top.
So, time to get to work, I dusted it all off and got it prepped for painting. I decided on Old White Chalk Paint with clear wax. The first coat went on pretty thick and the tutorials that I watched said that the paint is made to thicken up to add a hand painted texture to your furniture. I think I wasted a lot of paint on the first coat though, it just didn't need such a thick coat since it offers such good coverage. On the second coat, I added a little water and it went on so much more smoothly. Pictured below are the tables after one coat of paint. They were very streaky and uneven but smoothed out perfectly after the second coat.
Next, I decided to distress the tables and headboard. I knew I wasn't going for a real Shabby Chic look but I did want to add a little more interest to the pieces. They have pretty, curved legs and some carved details on the front so I decided to take a little paint off the edges, nothing even, just hit the edges and details sporadically with a fine sanding block. I was amazed at how easily the paint comes off when sanded.
The waxing process was the hardest part. It was a little intimidating and I will see how my wax job holds up and possibly add another layer later. I applied one coat of wax to the legs and drawers of the tables and 2 coats to the top. The headboard got one coat of wax. I watched videos online to see how it's done. I recommend you watch Shaunna's video and she will also recommend you watch Miss Mustard Seed's tutorial. I decided not to use the dark wax like they are fond of, it was just too intimidating and it wasn't really the look I was going for in this space. I do hope to mess around with it soon though and practice with the dark wax.
Lastly, I put it all together and accessorized! I found the lamps and drawer hardware on clearance at Hobby Lobby. Mom has had the bedding for a while but we added new throw pillows from HomeGoods (pretty sure I couldn't live without that place) and cream sheets and a bedskirt from Target. Mom had the birdhouses and small ceramic birds outside on the patio and I stole those for the room (first I had to make her kill the wasps that had made themselves at home inside). The flowers above the bed are from Bombay Kids and used to be in Mom's library. I am still on the lookout for some type of bird art for the left side of the bed. The "Dream" expression and the "Home" sign on the door came from here.
Ta Da - the finished product! Emma decided to model the room for us!
I hope she enjoys the space and that her guests will be comfortable there. I know I will enjoy sleeping in this new, bright, cheerful, uncluttered room when I come to visit!


I so want a guest bedroom to do now after reading this!
ReplyDelete